
I work for a company that sees many Watchguard replacements and some of them still have decent hardware, but with no license it turns this hardware into a paperweight. Typically we recycle most of them, but this article will go through how you could repurpose the M470 series Watchguards with pfSense.
What is pfSense?
The pfSense project is a free network firewall distribution, based on the FreeBSD operating system with a custom kernel and including third party free software packages for additional functionality. pfSense software, with the help of the package system, is able to provide the same functionality or more of common commercial firewalls, without any of the artificial limitations. It has successfully replaced every big name commercial firewall you can imagine in numerous installations around the world, including Check Point, Cisco PIX, Cisco ASA, Juniper, Sonicwall, Netgear, Watchguard, Astaro, and more.
Now that you know the backstory, let’s get to the interesting stuff. You’ll need a few pieces of hardware in order to get these firewalls up and running again.
Some of this hardware depends on your Watchguard. For this article, we’ll be working with the M470. The M470, needs a mSATA reader. I found this on Amazon and it worked great:
We’ll need a console cable since this hardware doesn’t have VGA outputs. The cable I’ll be using will be this one:
Good news, that’s all the hardware you’ll need other than the actual Watchguard. I don’t get anything from you ordering from Amazon, so if you have another preferred vendor, feel free!
Let’s begin…
Here’s the mSATA drive you’ll be looking for in the M470:

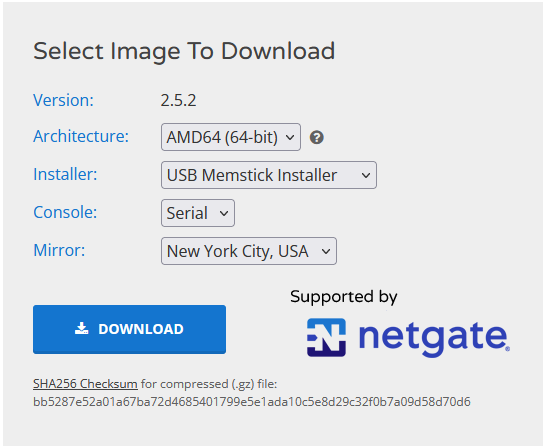
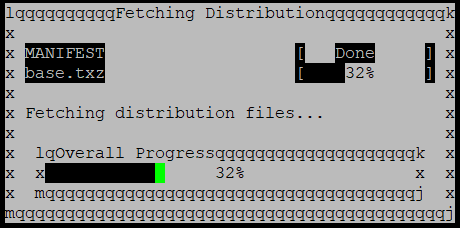
Plugin the mSATA reader into your computer and head on over to the pfSense site to download your image. Here is the link to the site These are the download options.
Using rufus or any other image writing software, write this image to your mSATA drive from the Watchguard. Once you’re finished, pop the SD card back into the Watchguard and connect your console cable to the Watchguard. It’s time to boot!
Never used PuTTY to console into a Watchguard? You’re in luck since I have some tips. Firstly, here are the Watchguard settings for PuTTY.
https://techsearch.watchguard.com/KB/?type=KBArticle&SFDCID=kA2F00000000L5HKAU&lang=en_US
Second, here’s a video explaining how to setup PuTTY for console access.
Let’s fire up our Watchguard and see if the SD card boots successfully. You can start the PuTTY connection before powering on the Watchguard, that way you’ll watch it as it boots.
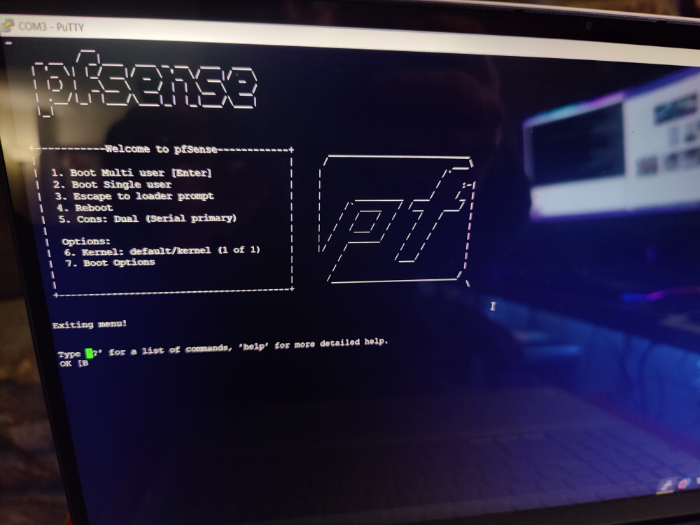
You should see this menu if you’ve done everything right. Now comes the fun part, let’s install the OS! Let it boot to the Boot Multi User mode. You’ll be asked what console type you want when it’s done booting. Any of them will do, but we’ll be selecting vt100.
Accept the license agreement on the first screen.
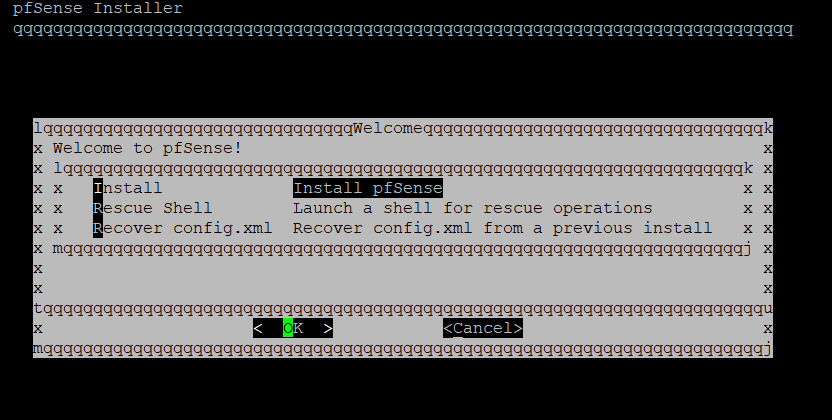
Hit OK to start the install
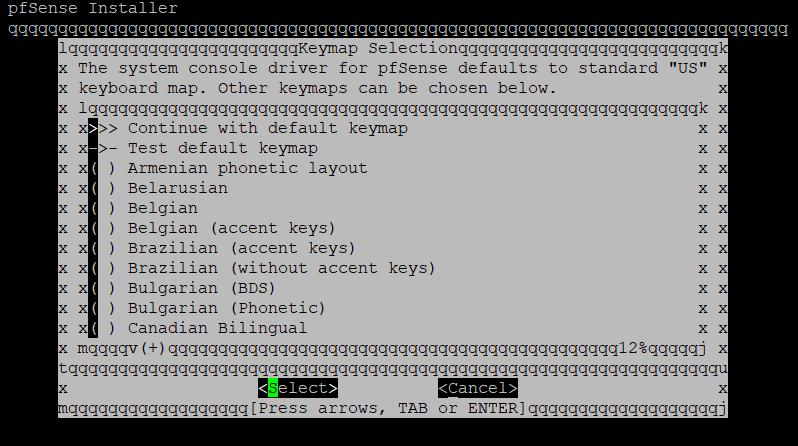
Select your language.
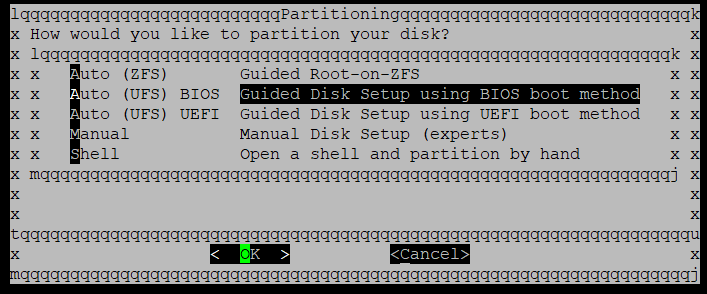
Select Auto (UFS) Bios. You may get an error about device being busy, but wait a few seconds, hit enter a few times and it’ll get by it.
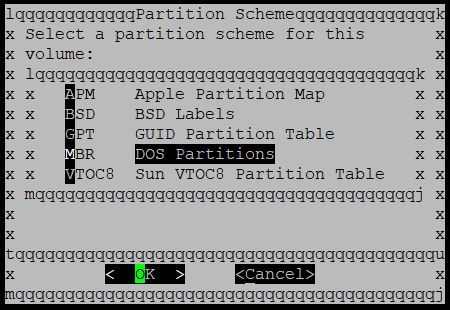
Now the weirdness continues! At this screen, instead of selecting OK, select Cancel
Yes.. it’s installing even though we hit cancel. Funny part is that we’re all done! The next menu will ask you if you want to make any final modifications, just hit No. Last menu will ask you to reboot.
Once you hear the magic pfSense beep, you’re all good to go. Connect your internet to eth0 and eth1 to your network/computer. The default IP address for pfSense is 192.168.1.1. You can also change settings via the console menu.